
ImGui 활용한 DirectX 11 3D를 이용한 2D를 만드는 내용입니다.
본 내용은 똑같이 사용할 수 없음을 알립니다. (참고및 공부자료로 만들어진 내용임을 밝힙니다.)
전 과정에 대해 이해를 해야 다음 이 부분에 대한 이해를 할 수 있음을 밝힙니다
이전 자료) https://ppatabox.tistory.com/44
1) 대칭성
들어가기전sin과 cos의 대칭성을 알아야 한다.
회전이라는게 대칭성을 가져야 한다.
왜? 항상 사인과 코사인의 세타 값은 일치해야 한다.
직각삼각형을 보면
회전식을 얘기 할때
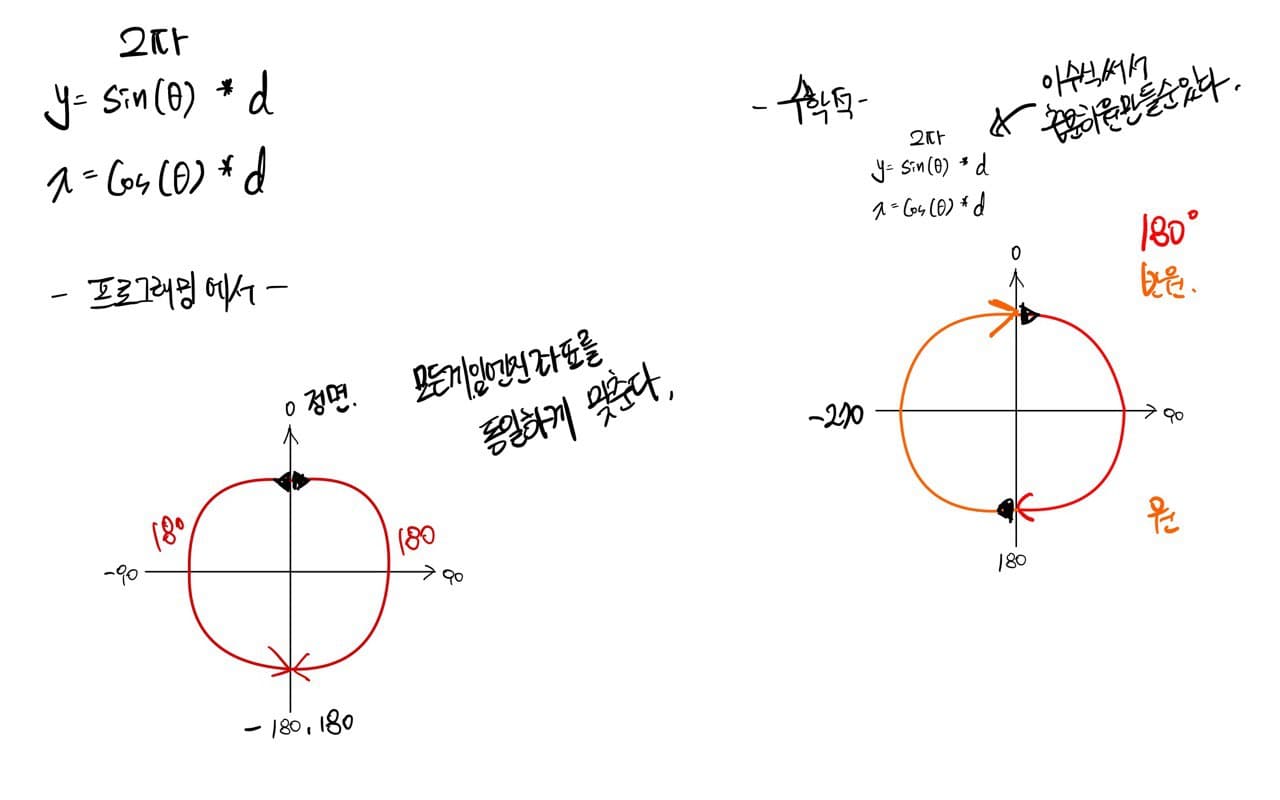
Y = sin * d
X = cos * d
그래픽 프로그래밍 에서는 원으로 정리할려고 이런식으로 많이 쓴다.
y 축은 sin에 맵핑
x 축은 cos에 맵핑 한다고 생각하면 된다.
수학적으로 유도하면 간단하게 유도는 가능한데
그냥 이런식으로 정리 해놓는다.
동일한 세타값이 -1 부터 1까지 돌린다고 생각하면 원이 된다.
라디안 각 파이 기준 PI = 180
2piR =
실제 우리가 프로그래밍에서 이렇게 축을 얘기 하기가 힘들다
그래서 프로그래밍에서는 반대로 주게 된다.
그렇다면 d를 반지름으로 볼수 있지 않을까?
그러면 항상 일정하게 회전하는 것을 볼 수 있다.
그렇게 해서 선을 연결하면 원이 된다. (LINELIST)
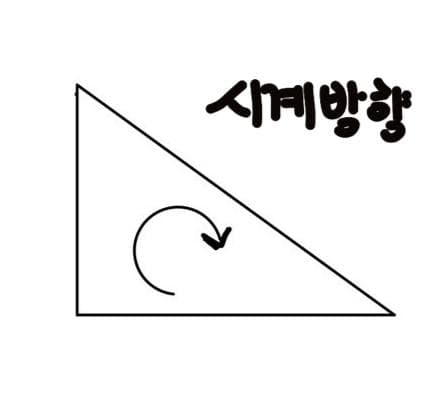
우리가 왼손좌표계를 사용하는데
시계 방향
오른손 좌표가 3D 나 수학에서는 사용하는 기본개념인데
DX는 왼손 좌표계 10으로 넘어 오면서 오른손 좌표계로 바뀌긴 했는데
구버전 자료를 이용해서 왼손좌표계를 사용한다.
게임프로그래밍 대부분은 왼손좌표계를 쓴다.
왼손 좌표계는 기준은 모니터 안쪽으로 들어갈 수록 Z가 커짐
내쪽으로 올수록 값이 커지면 오른손 좌표계

축 회전
2D 이지만 3D공간 모든 회전은 축을 기준으로 회전 한다.
축 자체는 변화 되지 않고 나머지 두축이 변한다.
자기 회전때는 자기 회전값은 변하지 않는다.
유도식
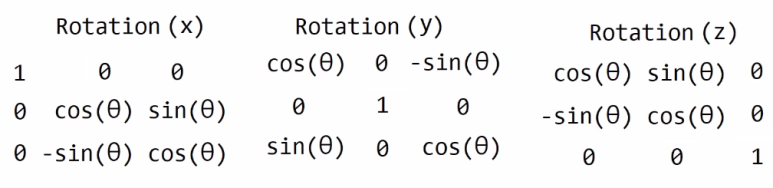
x방향에 대한 회전 행렬
y방향에 대한 y 축은 평면상에서 회전한다
z변하진 않고 자리만 변하고
나머지는 바닥면이랑 반대하면서 회전하는데
y축만 평면상에서 회전
2D에서는 X Y축 회전 안씀 평면상인데 어차피 안보임
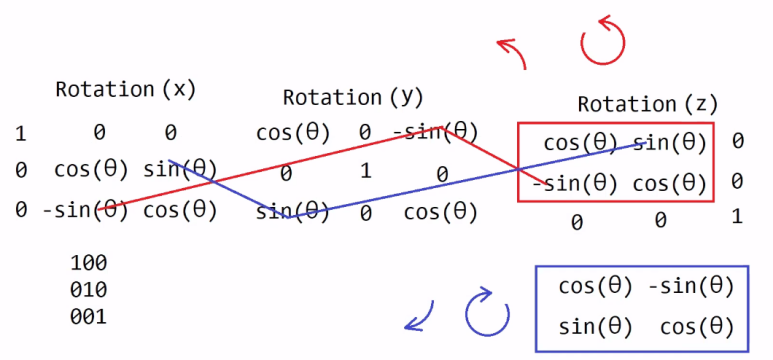
z회전만 다룸
1) Texture.h Rotation 생성
#pragma once

class Texture
{
public:
	Texture(wstring file);
	~Texture();

	void Position(float x, float y, float z = 0);
	void Position(const D3DXVECTOR3& position);
	void Position(D3DXVECTOR3* position);

	void Scale(float x, float y, float z = 1);
	void Scale(const D3DXVECTOR3& scale);
	void Scale(D3DXVECTOR3* scale);

	void Rotation(float z); //z 값만 받음
	void Rotation(float* z);

	void RotationRadian(float z);
	void RotationRadian(float* z);

	void Render();

private:
	struct Vertex
	{
		D3DXVECTOR3 Location;
		D3DXVECTOR2 Uv;

		Vertex()
		{
			Location = D3DXVECTOR3();
			Uv = D3DXVECTOR2();
		}

		Vertex(D3DXVECTOR3 location, D3DXVECTOR2 uv)
		{
			Location = location;
			Uv = uv;
		}
	};

	struct WVP
	{
		D3DXMATRIX World;
		D3DXMATRIX View;
		D3DXMATRIX Projection;
	} wvp;

private:
	D3DXVECTOR3 position;
	D3DXVECTOR3 scale;
	D3DXVECTOR3 rotation;

private:
	Shader* shader;

	Vertex vertices[6];
	VertexBuffer* vertexBuffer;
	ConstantBuffer* wvpBuffer;

	ID3D11ShaderResourceView* srv;

	ID3D11SamplerState* sampler;
};
// z 회전이면 x, y만 들어가고 z는 변하지 않음 변수? 중에 cos 또는 cosf 라고 되어 있는 것이 있다. x= cos 이걸 쓰면 거의 double로 매칭 됨 (double float longdouble) cosf는 float을 다루기 때문에 f를 붙여준다
#include "stdafx.h"
#include "Texture.h"

Texture::Texture(wstring file)
{
	vertices[0] = Vertex(D3DXVECTOR3(-0.5f, -0.5f, 0), D3DXVECTOR2(0, 1));
	vertices[1] = Vertex(D3DXVECTOR3(-0.5f, +0.5f, 0), D3DXVECTOR2(0, 0));
	vertices[2] = Vertex(D3DXVECTOR3(+0.5f, -0.5f, 0), D3DXVECTOR2(1, 1));

	vertices[3] = Vertex(D3DXVECTOR3(+0.5f, -0.5f, 0), D3DXVECTOR2(1, 1));
	vertices[4] = Vertex(D3DXVECTOR3(-0.5f, +0.5f, 0), D3DXVECTOR2(0, 0));
	vertices[5] = Vertex(D3DXVECTOR3(+0.5f, +0.5f, 0), D3DXVECTOR2(1, 0));

	D3D11_INPUT_ELEMENT_DESC layoutDesc[] =
	{
		"POSITION", 0, DXGI_FORMAT_R32G32B32_FLOAT, 0, 0, D3D11_INPUT_PER_VERTEX_DATA, 0,
		"UV", 0, DXGI_FORMAT_R32G32_FLOAT, 0, 12, D3D11_INPUT_PER_VERTEX_DATA, 0
	};
	UINT elementCount = ARRAYSIZE(layoutDesc);


	shader = new Shader(L"effect.hlsl");
	shader->CreateInputLayout(layoutDesc, elementCount);

	vertexBuffer = new VertexBuffer(vertices, 6, sizeof(Vertex));
	wvpBuffer = new ConstantBuffer(&wvp, sizeof(WVP));


	D3DXMatrixIdentity(&wvp.World);
	D3DXMatrixIdentity(&wvp.View);
	D3DXMatrixIdentity(&wvp.Projection);


	D3DXVECTOR3 eye(0, 0, -1);
	D3DXVECTOR3 lookAt(0, 0, 0);
	D3DXVECTOR3 up(0, 1, 0);

	D3DXMatrixLookAtLH(&wvp.View, &eye, &lookAt, &up);
	D3DXMatrixTranspose(&wvp.View, &wvp.View);

	D3DXMatrixOrthoOffCenterLH(&wvp.Projection, 0, (float)Width, 0, (float)Height, -1, +1);
	D3DXMatrixTranspose(&wvp.Projection, &wvp.Projection);


	wstring textureFile = L"../_Textures/" + file;
	HRESULT hr = D3DX11CreateShaderResourceViewFromFile(Device, textureFile.c_str(), NULL, NULL, &srv, NULL);
	assert(SUCCEEDED(hr));


	D3D11_SAMPLER_DESC samplerDesc;
	ZeroMemory(&samplerDesc, sizeof(D3D11_SAMPLER_DESC));

	samplerDesc.Filter = D3D11_FILTER_MIN_MAG_MIP_POINT;
	samplerDesc.AddressU = D3D11_TEXTURE_ADDRESS_WRAP;
	samplerDesc.AddressV = D3D11_TEXTURE_ADDRESS_WRAP;
	samplerDesc.AddressW = D3D11_TEXTURE_ADDRESS_WRAP;
	hr = Device->CreateSamplerState(&samplerDesc, &sampler);
	assert(SUCCEEDED(hr));
}

Texture::~Texture()
{
	SAFE_RELEASE(srv);

	SAFE_DELETE(vertexBuffer);
	SAFE_DELETE(wvpBuffer);

	SAFE_DELETE(shader);
}

void Texture::Position(float x, float y, float z)
{
	Position(D3DXVECTOR3(x, y, z));
}

void Texture::Position(const D3DXVECTOR3 & position)
{
	this->position = position;
}

void Texture::Position(D3DXVECTOR3 * position)
{
	memcpy(position, this->position, sizeof(D3DXVECTOR3));
}

void Texture::Scale(float x, float y, float z)
{
	Scale(D3DXVECTOR3(x, y, z));
}

void Texture::Scale(const D3DXVECTOR3 & scale)
{
	this->scale = scale;
}

void Texture::Scale(D3DXVECTOR3 * scale)
{
	memcpy(scale, this->scale, sizeof(D3DXVECTOR3));
}

void Texture::Rotation(float z)
{
	rotation = D3DXVECTOR3(0, 0, 0);
	rotation.z = -Math::ToRadian(z);
}

void Texture::Rotation(float * z)
{
	*z = Math::ToDegree(rotation.z);
}

void Texture::RotationRadian(float z)
{
	rotation = D3DXVECTOR3(0, 0, 0);
	rotation.z = -z;
}

void Texture::RotationRadian(float * z)
{
	*z = rotation.z;
}

void Texture::Render()
{
	D3DXMATRIX S, R, T; //s r t 순서

	D3DXMatrixScaling(&S, scale.x, scale.y, scale.z);
	D3DXMatrixTranslation(&T, position.x, position.y, position.z);

	//D3DXMatrixIdentity(&R); //임의
	//
	//R._11 = cosf(rotation.z); // z 회전이면 x, y만 들어가고 z는 변하지 않음
	//R._12 = sinf(rotation.z); // sin
	//R._13 = 0.0f;

	//R._21 = -sinf(rotation.z); 2행시작부
	//R._22 = cosf(rotation.z);
	//R._23 = 0.0f;

	D3DXMatrixRotationZ(&R, rotation.z); //앵글 하나 정확히 회전하게 Int함수

	wvp.World = S * R * T;
	D3DXMatrixTranspose(&wvp.World, &wvp.World);


	DeviceContext->PSSetSamplers(0, 1, &sampler);
	DeviceContext->PSSetShaderResources(0, 1, &srv);
	DeviceContext->IASetPrimitiveTopology(D3D11_PRIMITIVE_TOPOLOGY_TRIANGLELIST);

	shader->Render();
	vertexBuffer->Render();
	wvpBuffer->Render();

	DeviceContext->Draw(6, 0);
}
main.cpp에서
#include "stdafx.h"
#include "System/Device.h"
#include "Utilities/Math.h"
#include "Text.h"
#include "Rect.h"
#include "Texture.h"

Texture* texture = NULL;
void InitScene()
{
	texture = new Texture(L"SingleMario.png");
	texture->Position(350, 350);
	texture->Scale(200, 200);
}

void DestroyScene()
{
	SAFE_DELETE(texture);
}


float rotation = 0;
void Update()
{
	ImGui::SliderFloat("Rotation ", &rotation, -180, 180); //수치 값 확인 항방향으로 돌게

	texture->Rotation(rotation);
}

void Render()
{
	texture->Render();
}
effect.hlsl
struct VertexInput
{
    float4 Position : POSITION0;
    float2 Uv : UV0;
};

struct PixelInput
{
    float4 Position : SV_POSITION;
    float2 Uv : UV0;
};


cbuffer VS_Wvp : register(b0)
{
    matrix World;
    matrix View;
    matrix Projection;
}

PixelInput VS(VertexInput input)
{
    PixelInput output;

    output.Position = mul(input.Position, World);
    output.Position = mul(output.Position, View);
    output.Position = mul(output.Position, Projection);
    output.Uv = input.Uv;

    return output;
}


SamplerState Sampler : register(s0); //샘플러 남김
Texture2D Texture : register(t0);

float4 PS(PixelInput input) : SV_TARGET
{
    return Texture.Sample(Sampler, input.Uv); //샘플러
}
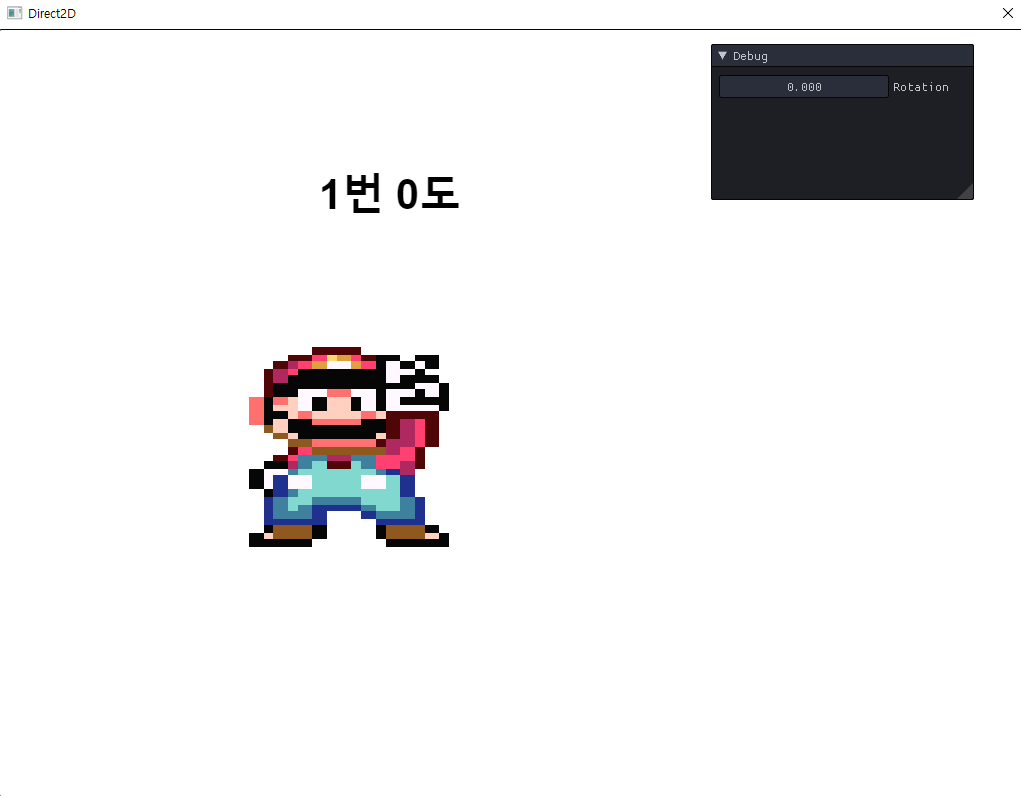
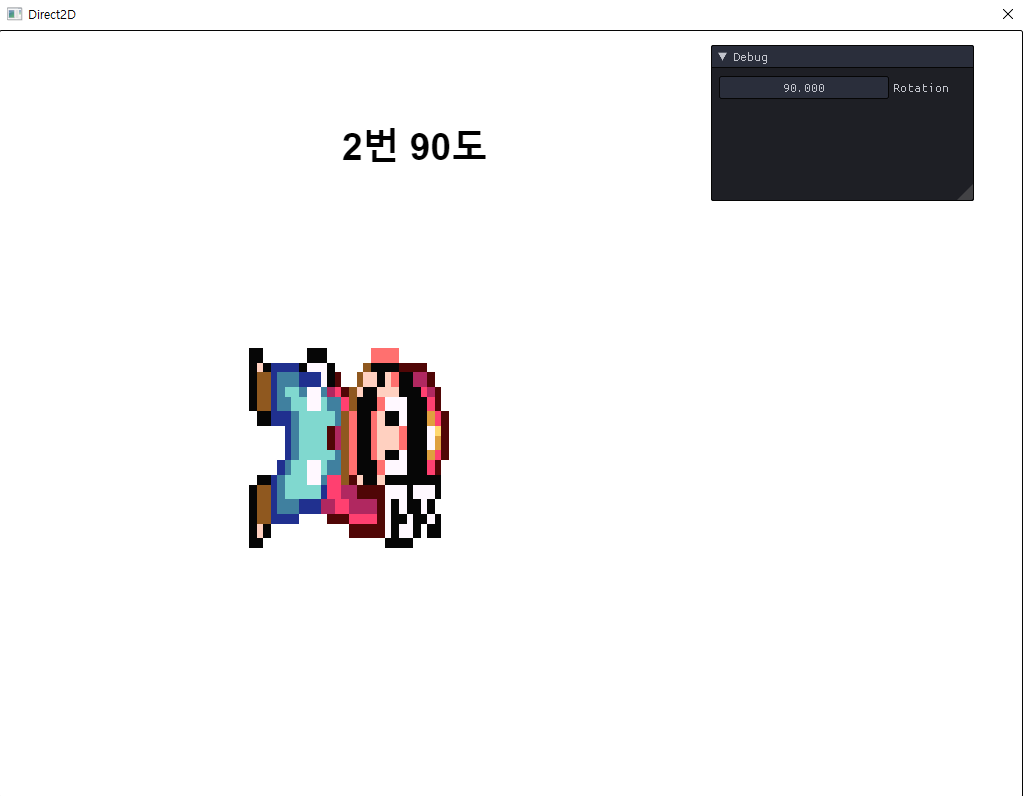
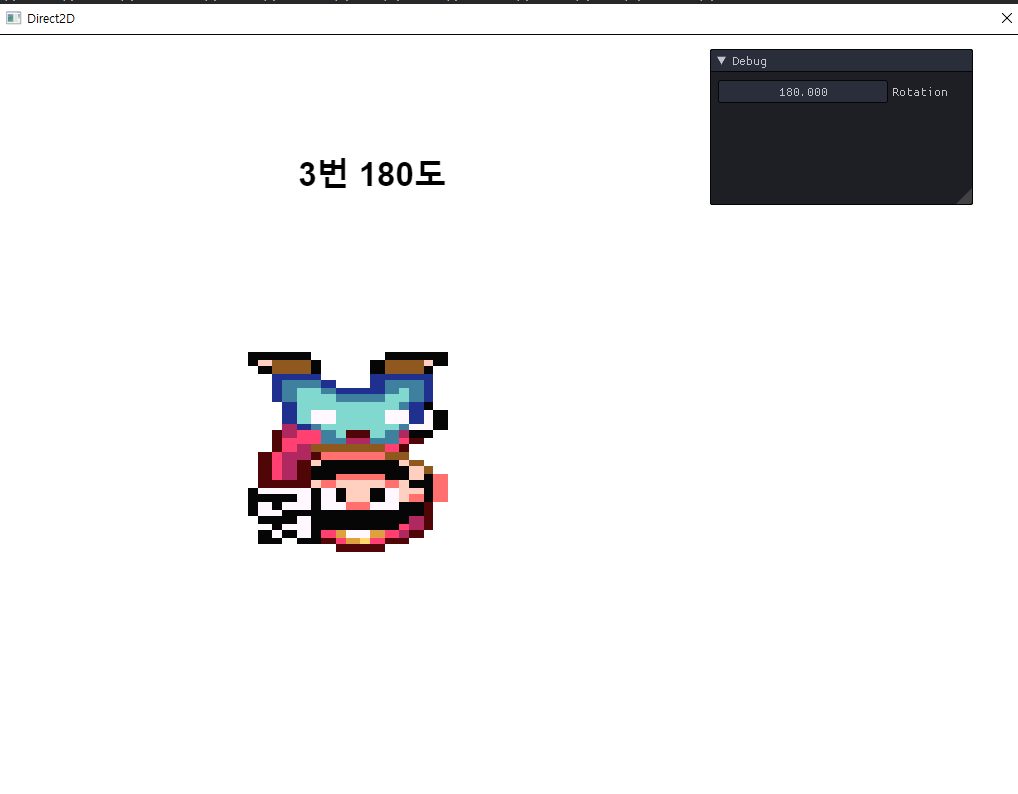
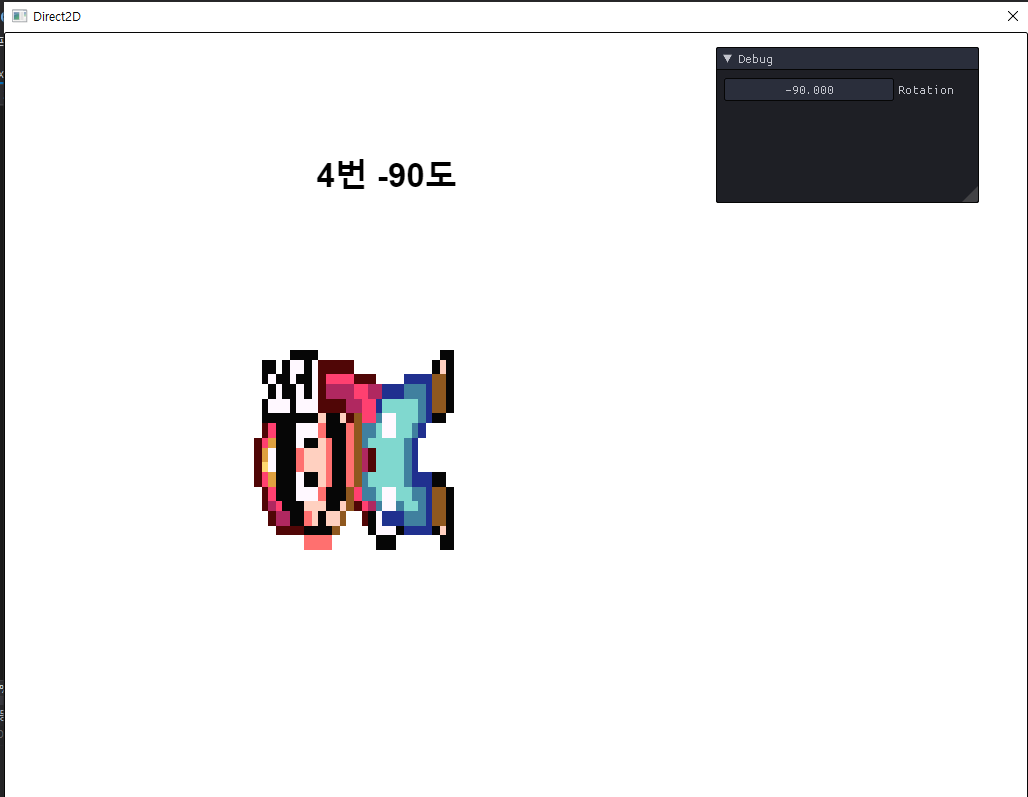
캐릭터의 중점으로 부터 X Y 축 안에서 Z축이 회전하는 걸 볼 수 있다.
-3.14.든 + 3.14 든 동일한 위치
3.14의 반은 1.5709634 하면 90도 나온다 파이가 = 180
좌표값은 항상 명심 해야한다.
0도면 위
플러스 90도는 실제로 -90도 쪽이고 (마이너스 뒤집어 놔야함)
180도 아래
피벗 (중심점을 옮김) Textrue.cpp
	//vertices[0] = Vertex(D3DXVECTOR3(0.0f, 0.0f, 0), D3DXVECTOR2(0, 1));
	//vertices[1] = Vertex(D3DXVECTOR3(0.0f, 1.0f, 0), D3DXVECTOR2(0, 0));
	//vertices[2] = Vertex(D3DXVECTOR3(1.0f, 0.0f, 0), D3DXVECTOR2(1, 1));

	//vertices[3] = Vertex(D3DXVECTOR3(1.0f, 0.0f, 0), D3DXVECTOR2(1, 1));
	//vertices[4] = Vertex(D3DXVECTOR3(0.0f, 1.0f, 0), D3DXVECTOR2(0, 0));
	//vertices[5] = Vertex(D3DXVECTOR3(1.0f, 1.0f, 0), D3DXVECTOR2(1, 0));
위 코드의 부가적 설명 이라고 생각하면 됨
radian 각도를 degree 바꾸기 (360도)
degree를 다시 radian으로 바꾸는 함수
위 쪽 코드에서도 보이긴 하지만
한번더 설명하겠음
math.h
float으로 다루기 위함
Static변수는 반드시 초기화는 해야하는데 방법이 외부초기화를 해줘야 한다.
source파일로 가서 자료형을 먼저 붙여준다 해당 클래스 영역에 있다 라고 표시하고
Math::(영역정의)PI = 3.14159265f; (float은 뒤 8자리까지)
class Math
{
public:
	static const float PI;
외부(.cpp)에 지정한다.
const float Math::PI = 3.14159265f;
PI가 180도 니까 radian은 아까 -1 부터 1까지의 범위 라고 했다
PI / 180 으로 나눠주면 되는데
float Math::ToRadian(float degree)
{
	return degree * PI / 180.0f; // 앞에 degree값을 곲해준다 degree를 먼저 곱한다음 180으로 나눠줌
}

float Math::ToDegree(float radian)
{
	return radian * 180.0f / PI; //순서만 바뀜
}
texture.h 에서 기본 Rotation을 Radian으로 쓰자
	void RotationRadian(float z);
	void RotationRadian(float* z);
Texture.cpp 에서
void Texture::Rotation(float z)
{
	rotation = D3DXVECTOR3(0, 0, 0);
	rotation.z = -Math::ToRadian(z); //방향을 뒤집기 위함
}

void Texture::Rotation(float * z)
{
	*z = Math::ToDegree(rotation.z);
}

void Texture::RotationRadian(float z)
{
	rotation = D3DXVECTOR3(0, 0, 0);
	rotation.z = -z; // 방향을 뒤집기 위함 해당 화면에서는 오른쪽 방향으로 회전
}

void Texture::RotationRadian(float * z)
{
	*z = rotation.z;
}
반투명
반투명이란 것이 현실에서는
덜 반투명한거 좀 반투명한것을 뒤에 두던 해서 합산의 결과를 눈으로 볼 수 있는데
컴퓨터 그래픽에서는 맨 먼저 불투명 반투명이 강할 수록 가장 나중에 그려져야 한다.
RGBA 가 있는데
A - Alpha 얘가 1이면 불투명 0이면 투명
얘가 값이 큰게 먼저 그려져야 한다.
컴퓨터에서는 앞에 불투명한게 있으면 뒤에 반투명한건 가려져서 뒤에껄 빼버린다
먼저 그려진걸 0.3이고 나중에 그려진게 0.7이라고 하면 어차피 0.3이 불투명 해져 있기때문에
0.7이 안보인다.
그래서 항상
불투명 -> 반투명 순으로
힘들어 지는 이유)
디자인팀과 애기 할때 어려움 반투명 작업(안나오는 장소?)
욕실(어설프게 나오고 물을 튼 상태가 잘 안나옴)
수증기, 습기, 물 반투명이여서 구현이 어려움

처리 하기 힘든 이유가
1) 반투명 ( 물줄기 수증기 내려오면서 밀도 색이 달라짐 반투명 반투명 반투명)
그리기 위해서 이해해야 하는 분야가 있다.
Alpha blending
이 식 외에도 다양한 식이 있다.
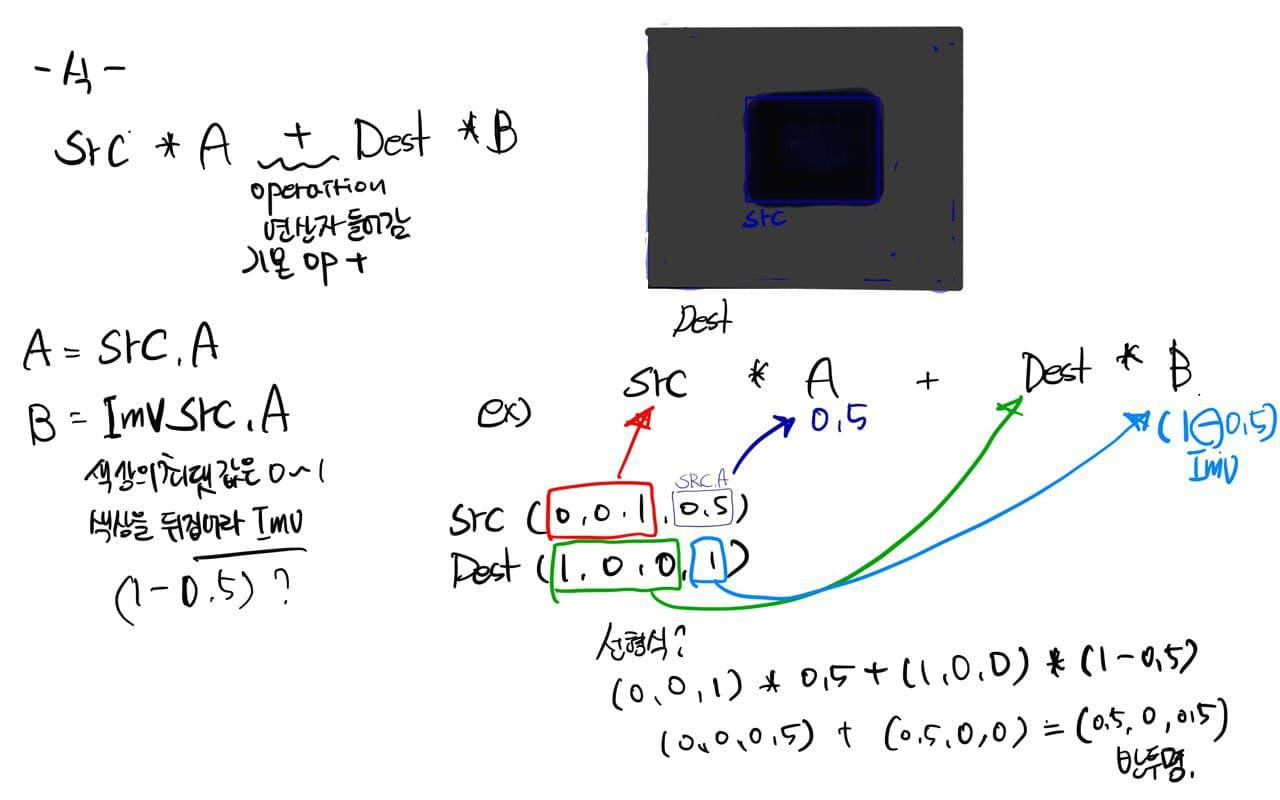
만약 SRC랑 DEST 색을 곱하면 색을 어둡게
1이 아닌 어떤 값을 곱해도 점점 떨어질수록 어두워진다.
어떤 숫자를 더하면 밝은 쪽으로 간다
어둡게 하고 싶으면
A = DEST 넣고
B = Zero
뒤는 사라지고 곱한 결과만 나옴
EDITED는 A= 1 B = 1넣어주면 src랑 desc는 그대로 남고 더해진다.
디자이너 에겐 옵션을 풍부하게 주면 좋다(프로그래머가 편해짐..?)
프로그래머는 수식으로 보는데
디자인 팀은 경험으로(디자인감각으로) 그래서 일을 줄이기 위해서
다 열어준다. (옵션)
프로그래머는 종합해서 보여줘야 하기때문에
인원도 많이 필요없음
Tool을 만들어주면 됨
신입이 들어오면 미뤄놨던 하긴 해야하는데 중요하지 않은것
하나 그려지고 또하나 호출
배경화면이 이미 그려져 있는 상태
블렌딩(Blending), 알파 블렌딩(Alpha Blending)이란 무엇일까?
블렌딩(Blending)란 무엇일까? 블렌딩이란 '서로 다른 두개의 물건을 섞어서 다른 결과물을 만들어 내는 것'이다. 그렇다면 알파 블렌딩(Alpha Blending)이란 무엇일까? 알파 블렌딩이란 이미지위
blog.daum.net
다음시간)
[C++] DirectX 알파 블렌딩 과 렌더타겟 | Alpha blending with Render Target
ImGui 활용한 DirectX 11 3D를 이용한 2D를 만드는 내용입니다. 본 내용은 똑같이 사용할 수 없음을 알립니다. (참고및 공부자료로 만들어진 내용임을 밝힙니다.) 전 과정에 대해 이해를 해야 다음 이
ppatabox.tistory.com
'🅿🆁🅾🅶🆁🅰🅼🅼🅸🅽🅶 > DɪʀᴇᴄᴛX 2D' 카테고리의 다른 글
| [C++] DirectX 알파 블렌딩 과 렌더타겟 | Alpha blending with Render Target (0) | 2021.11.23 |
|---|---|
| [C++] DirectX World|View|Projection 활용 구현 랜덤 사각형 (0) | 2021.11.20 |
| [C++] DirectX Texture _ Uv (0) | 2021.11.19 |
